How to Remove Dried Silicone Sealant
Jun 24th 2024
Silicone sealant is a great option when it comes to home renovations, repairs, and even initial construction. It’s highly durable, mitigates water damage and fungal growth, and can last for years – but nothing truly lasts forever.
When it’s time to change out sealant, proper removal can be key. Otherwise, we can face issues like new sealant not adhering completely or old sealant leaving unsightly residue.
Understanding how to go about removing silicone caulking can be key to a successful job when applying new sealant. Let’s explore some of the steps you might take, the tools you need, and other key considerations.
Gathering Supplies — What Do I Need to Remove Old Silicone Sealant?
When it comes to how to remove excess dried silicone sealant, the right tools are important. Depending on your preferred method, the tools you may want can vary. For example, you might opt for the use of a silicone sealant removal agent or stick with hand tools.
These are some commonly used tools:
- A clean cloth
- Silicone removal agent or isopropyl alcohol
- Utility knife or plastic scraper
- Eye protection
- Respirator or mask
- Gloves
Step 1: Prepare Your Work Space
First, prepare your workspace. If you plan to use a silicone removal agent or isopropyl alcohol, be sure to properly ventilate the area. Clean the area with a damp cloth before beginning to remove any loose debris or dirt.
Prepare all the supplies you might need so that they’re within reach. Don your protective gear, including a mask or respirator, gloves, and eye protection.
Step 2: Remove Loose Sealant and Score The Rest
If the sealant is already coming off, you may be able to pull entire pieces off by hand. If you’re using a silicone removal agent, read the application instructions and follow them exactly. If the directions indicate a wait time, wait for that amount of time after application before proceeding.
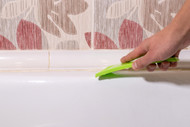
Next, use a utility knife or scraper to score off the old sealant, keeping the knife flush against the surface. Be careful not to press too hard or scratch the surface itself. If the surface you’re working with scratches easily, consider using a plastic scraper instead.
Step 3: Complete Removal
Once you’ve scored the old sealant and waited for your silicone sealant removal agent to take effect, it’s time to pull off the loose sealant. After removing loose sealant and scoring the rest, this should take most if not all of it off.
Step 4: Clean the Surface
Once you’ve removed all debris and residue, go over the area with a clean cloth, dampened with clean water. Next, use a dry cloth to completely remove any remaining moisture.
Then, give it some additional time to dry completely before attempting to apply more silicone sealant. This will allow water to evaporate if it has seeped into any cracks or crevices that the dry cloth couldn’t get to. If there is any moisture left on the surface, the new sealant may not be able to set properly.
Additional Tips for How to Remove Excess Dried Silicone Sealant
Here are some tips as you remove old silicone sealant:
- If you’re using a silicone removal agent, read the instructions carefully and follow them exactly.
- Be sure to keep your workspace ventilated
- If using heat: You may see recommendations to heat the old silicone. If you’re using a heat gun to heat and soften the old silicone sealant, first consult with your manufacturer's directions, keep it on a low setting, and ensure the area is completely dry before plugging it in or using it.
- Do not use a heat gun if you’re using a silicone removal agent.
- Do not use a heat gun around moisture or isopropyl alcohol.
- Do not use a heat gun around materials susceptible to heat damage such as plastics.
- Always follow manufacturer directions if using a heat gun.
Step 5 and Beyond: Applying New Silicone Sealant
Once the area is clean and fully dry, you can apply new silicone sealant. For more information on silicone sealants and their application, be sure to check out the rest of our blog. For high-quality silicone sealants — as well as caulking accessories and more — be sure to check out our extensive selection today!

