Kitchen Sink Installation Tips
Jul 29th 2023
As a professional contractor, you know how important it is to bring make every project count. From installing sinks to waterproofing a bathroom, every project is an opportunity to make a name for yourself as a reliable contractor or disappoint a client.
That’s why we’ve collected these kitchen sink installation tips to help you complete your projects perfectly. We’ll cover the types of sinks you might be working with, the safe removal of old sinks, increasing the lifespan of the new sink, and much more. Let’s get started with our essential installation tips.
Know The Types of Kitchen Sinks
There are three main types of kitchen sinks, and the installation looks different for each of them. Here’s a quick breakdown of each type:
Undermount Sinks
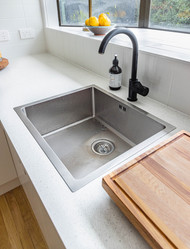
Undermount sinks are installed directly below the countertop opening. This gives your countertop a smooth, unbroken surface all the way to the sink’s opening. This makes it easy to clean the counter and avoid any bumpy surfaces. However, because the undermount is mounted below the counter, it will need to be securely attached to support the weight of any heavy dishes.
Drop-In Sinks
Drop-in Sinks are installed by “dropping them in” to a hole in your countertop. With a sink rim that rests on the countertop, this is the easiest sink to install. With a solid countertop, a secure drop-in sink primarily holds itself up by the rim, though some fastening clips may be needed to keep it from shifting.
Farmhouse Sinks
Farmhouse sinks have a deep basin and an exposed front. They’re great for washing large pots and pans, which means you are more likely to run into them with a client who is often in the kitchen. Their shape usually means that you’ll be working with a smaller space in the base, and less room to manuever.
Assess the Old Sink
When you are hired to install a kitchen sink for a homeowner client, it’s likely that you’ll have to remove the old sink as well. Taking a quick look at the old sink can save you a headache later on, so look for any potential problems with the old sink. If the homeowner mentioned a leaking problem, you’ll want to check the pipes for leaks before you get started.
Installing a new sink but keeping leaky pipes is a homeowner’s nightmare, so if leaks are a problem, you’ll want to address that with the homeowner before you go too far.
Completely Disconnect the Old Sink
There’s nothing quite like a sudden face full of water when you’re working underneath a sink, so make sure to turn off the water supply before getting started. Faucets can be easily bumped when you are working on sink installation, and water pouring without a sink is a mess you don’t need.
You’ll also want to disconnect the sink from the pipes that take dirty water to the drain line. If the kitchen sink has a garbage disposal, you’ll want to disconnect and remove that as well. Always make sure everything is completely disconnected and powerless before you attempt to remove it.
After that, you can remove the clips and screws on the underside of the sink that hold the sink to the countertop. You’ll want to use a wrench or pliers to loosen the nuts holding it together. Once the sink is free, you’ll either lift or lower it out, depending on the style.
You may also need to remove the old sink’s caulking that seals it against water. Applying a caulk remover and scraping with a putty knife should do the trick.
Seal the New Sink
Dropping in the new drop-in sink or correctly positioning the new undermount sink is only part of the challenge of sink installation. The next step is to make sure the new sink lasts.
A stainless steel sink might never crack to let in mold, but the edges around the sink opening are another story. This is where products like plumber’s putty or silicone sealant come in. A truly long-lived sink installation needs to prevent mold and cracks by being watertight.
To properly seal a new sink, you’ll need silicone caulk and a putty knife or utility knife. Apply a line of caulk around the rim of the sink, and use the putty knife to remove excess caulk. Let the caulk cure before putting the sink into action. Silicone sealant has a quick curing time of 24 hours to a few days, depending on the type of product.
Connect the New Sink
With a secure sink, now is the time to reattach everything you removed from the old one. The garbage disposal, sink drain, and water supply all need to be attached to the new sink. Again, a new sink is measured by a leak-free lifespan, so you’ll want to double-check the security of all the new fastenings.
Test the New Sink
Once the caulk has cured, it’s time to test the new sink. Run the hot and cold water, and test out the garbage disposal. Check the pipes thoroughly one last time before showing your client that you’ve completed their sink’s installation with a quality that lasts.
Don’t Sink Your Chances at Sink Installation Success
A kitchen sink installation is much more than tightening bolts and attaching pipes. It’s all about making sure that each individual step happens in perfect alignment with the others, so that the sink is fully operational and problem-free for many years to come.
Double-checking your work is one way to be confident in your installation, but another way is by using high-quality tools.
Silicone Depot provides high-quality, reliable sealant products for your installation needs. We offer premium products at affordable prices, and we’re here to help you install kitchen sinks with quick-curing silicone and more.
Check out our products today and get your installations done right!

