How to Repair a Leaky Gutter with Silicone Sealant
Mar 30th 2023
Have you been noticing that your gutter is leaking during rainy weather conditions? If you see water dripping from the roof, puddles of water around the house, or a musty smell inside your home, water damage from leaking gutters might be the root issue. If left unaddressed, leaky gutters can have a massive impact on the interior of your home.
You can fix the issue (and prevent it) by routinely checking your gutters, especially if they haven’t been repaired in a while. You can fix a leaky gutter on your own with silicone sealant.
Although this powerful adhesive has many uses around the interior of a home, such as sealing windows, bathtubs, sinks, and more, it’s especially useful for outdoor projects and repairs because of its weather-resistant properties and durability. Of its many exterior uses, silicone sealant is often used to treat leaky gutter systems. By following the following steps, you can identify and address gutter leaks before they get worse.
Before you begin, you’ll need to have the following tools to fix a leaking gutter:
- silicone sealant (butyl rubber caulks also works well)
- A secure ladder
- rubbing alcohol and wire brush
- hardware gloves
- a garden trowel or putty knife
- caulking gun
Step 1: Clean Out Gutters
First, grab your ladder and gloves and check the condition of the rain gutters. Are they full of soggy leaves and gunk? If so, the leak may just be a clog or spillover. Using a trowel or your hands, scoop out as much of the debris as you can and drop it into a bucket below. To get rid of stubborn grime sticking to the inside of the gutters, you can use a plastic scouring pad to scrub it away.
Afterward, you can clean out rust using rubbing alcohol and a wire brush. Afterward, give the gutter a good power wash with the garden hose to clear out any remaining gunk. Even if you find your gutters aren’t clogged, it’s good practice to clean them thoroughly before repairing them. Regularly cleaning out your gutters is a great way to keep them in tip-top shape and prevent you from having to make future repairs.
Step 2: Seal Holes, Cracks, and Gaps
Another way to check for leaks is by checking for small cracks and holes where water may be dripping down. This can be common in aging homes, and can easily be fixed with a tube of silicone caulk— this is one of the best materials to work with in outdoor environments due to its UV-resistant and waterproof properties. All you have to do to apply sealant is squeeze a small amount into cracks or holes, then make an additional seal over the area.
If you aren’t able to find any holes that are the cause of the leak, then the issue may be with leaking gutter joints or a leak seeping through gutter seams. This can easily be solved using silicone sealant or butyl rubber caulk in the next step.
Step 3: Fix Leaky Gutter Joints
To fix a leaky gutter joint, you’ll have to repair gutter seams. After identifying the leak and cleaning out the gutter (steps 1 and 2), unclip the gutter bracket where the leak is and apply a layer of silicone sealant to the inside edge of the seam or at the end cap joint. You can apply the sealant with a caulking gun to ensure proper control.
Make sure you exert a steady pressure on the gun, spreading a small amount of sealant and smoothing it out over the area. Drying time for silicone sealants can be as short as 30 minutes, but it will take up to a full day for them to cure. After the sealant is cured completely, you can put your repair to the test by flushing water through the seal to see if the gutter joint still leaks.
More Leaky Gutter Fixes With Silicone Sealant
There are many other ways silicone sealant can be used to fix problem areas in rain gutters. Old and worn gutters may require sealing or repair in other areas. Here are a few more ways you can use silicone sealant on a leaky gutter.
Fix the End Cap
If you spot the end cap is leaking or see that it’s broken or cracked in spots, you can fix the problem in a few simple steps. First, place your ladder below the broken or leaking end cap. After checking the problem for damage, you may need to clean the area again and scrape old caulk with a putty knife. Hammer the end cap into place to ensure it’s firm before you apply a line of sealant along the inside of the gutter where it meets the cap.
Seal a Leaky Downspout
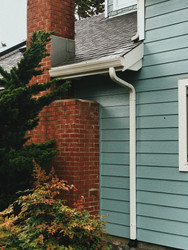
The downspout is the part of the gutter that carries rainwater from your roof down to a drain or ground level. The downspout is a part of the gutter especially susceptible to damage. It takes a lot of abuse over the years, from heavy blizzards to scores of pouring rain. This leads to internal pressure from too much water or build-up. Over time, it can lead to damage and cracking. You can fix cracks or holes on the downspout using waterproof silicone sealant. To add a further barrier against future leaks, add more sealant around the original installation of the downspout along the gutter.
For the Best Silicone Sealant, Shop With Silicone Depot.
The quality of the sealant you use to fix your gutters could have a big impact on how long your repair lasts. When it comes to repairing gutter issues, you’ll want to use caulk that’s flexible, durable, resistant to the elements, and available in a variety of colors. For the best silicone sealant, browse Silicone Depot’s catalog of silicone sealant products now!

