How to Use Silicone Sealant with Tiles
Mar 11th 2024
From the kitchen to the bathroom, tiles are a popular material for everything from floors to backsplashes. Applying silicone sealant properly is essential for ensuring durability, longevity, and mold-free product protection when installing these tiles.
Here’s how you can achieve the results your clients want and tackle future tiling projects with ease using silicone sealant.
Why Silicone Sealant?
Unlike other sealants, silicone remains flexible over time. With proper application, silicone sealants offer a long-lasting seal that withstands the rigors of daily use.
Its waterproof nature makes it ideal for sealing tiles in wet areas like bathrooms and kitchens. Silicone is ideal for a wide range of materials, including ceramic, porcelain, and glass tiles. These sealants offer a reliable bond that prevents water infiltration and promotes structural integrity. With tile, silicone sealant offers a secure and lasting finish in addition to its visual appeal.
Preparation Before Applying Silicone Sealant
Before applying silicone sealant on tiles, adequate preparation is key to ensure a successful and long-lasting seal.
Firstly, thorough surface preparation is essential. Clean the area meticulously to remove dirt, debris, or existing sealant residues.
If there’s old silicone sealant still on the surface, learn how to remove silicone caulk from the tile before finishing the cleaning process. Fortunately, the process of removing silicone from tiles is similar to the process for other surfaces. A sharp object, like a putty knife or razor blade, may be helpful for old silicone sealant removal.
Ensure the surface is completely clean and dry before proceeding.
Gather all necessary tools and materials, including silicone sealant, a caulking gun, a utility knife, and masking tape. Having everything within reach will streamline the application process and prevent interruptions.
Throughout the process, wear appropriate protective gear, such as gloves and safety glasses. Adequate workspace ventilation is also a best practice to disperse fumes and prevent inhalation.
Applying Silicone Sealant with Tiles
When working with tub and tile silicone seals, it’s especially important to ensure a waterproof seal, as those areas are at a higher risk for mold. If you are using silicone sealant on tiles that will be exposed to water, consider using a mold and mildew-resistant option.
Follow these five steps to achieve a professional finish when applying silicone sealant with tiles.
- Begin by thoroughly cleaning the area to remove any dirt, grime, or old sealant residue. Allow it to dry completely before you continue.
- Cut the nozzle of the silicone sealant tube at a 45-degree angle to the desired size. Puncture the seal inside the nozzle using a nail or wire.
- Prepare the sealant by loading it into a caulking gun, ensuring a smooth flow during application.
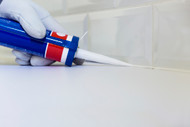
- Apply the sealant evenly along the joint or seam between the tiles, exerting consistent pressure on the caulking gun for a uniform bead.
- Once applied, use a silicone smoothing tool or your finger dipped in soapy water to smooth the sealant, ensuring it adheres tightly to the tiles and creates a neat finish. Remove any excess sealant using a damp cloth or scraper before it cures completely.
Special Tips
To elevate your silicone sealant application with tiles, prevent the sealant from drying prematurely, especially in large areas.
Plan your application strategy to ensure a continuous bead without interruptions. Prioritize proper ventilation to aid in the curing process. One way to do this is to open windows or use fans to promote airflow, creating a healthier environment during and after application.
Use masking tape along the edges of the tiles to achieve clean and precise lines. Apply the tape before caulking to create a barrier, then remove it immediately after smoothing the sealant to reveal sharp edges.
Mistakes to Avoid
To ensure a successful silicone sealant application with tiles, steer clear of these common mistakes that can compromise the quality of your seal.
- Avoid applying too much sealant, as excessive amounts can lead to messy, uneven seals and wasted material. Instead, apply a thin, even bead along the joint to achieve optimal results.
- Take the time to properly smooth the sealant after application to create a neat and uniform finish. Failure to do so can result in unsightly bumps and inconsistencies in the seal.
- Never ignore safety precautions when working with silicone sealant. Always wear protective gear and ensure good ventilation whenever possible.
Maintaining and Cleaning Silicone-Sealed Tiles
Maintaining silicone-sealed tiles is essential for preserving their appearance and functionality over time. Creating a guide you can give them on basic cleaning, maintenance, and warning signs of anything going wrong may be worthwhile.
Your clients should know to:
- Pay particular attention to the sealed joints, ensuring they remain debris-free.
- Implement regular cleaning routines to remove dirt and grime from the tiled surfaces.
- Address mold and mildew promptly should they notice any.
- Use vinegar and water or a commercial mold remover to eliminate any growth in the sealed areas.
- Periodically inspect the sealant for signs of wear or damage.
Seal Your Tiles With Silicone Depot
Silicone Depot is a trusted partner for many teams that work with silicone sealant on tiles, vinyl, and other surfaces. We are proud to be a valuable resource for tutorials, product information, and high-quality silicone sealants that are up for every task. Browse our selection of sealants or call us today at 812-824-8000 to find the perfect sealant for your next project.

